Introduction
Knowing how to use miter saw properly is one of the most valuable skills for any woodworker or DIY enthusiast. A miter saw allows you to make accurate angled cuts for trim work, furniture building, and home improvement projects with ease. However, to get the best results and ensure safety, it’s important to understand the tool’s functions, setup, and techniques before you begin. In this guide, you’ll learn everything you need to know—from setup and safety to troubleshooting and maintenance—so you can use your miter saw with confidence and precision.
Table of Contents
What Is a Miter Saw
Before learning how to use miter saw effectively, it’s essential to understand its purpose and functions. A miter saw is a power tool designed to make accurate crosscuts and angled cuts in wood, plastic, or metal. It uses a circular blade that moves downward onto the material, producing clean and precise results much faster than a hand saw. This tool is commonly used for cutting trim, molding, and frames, making it a must-have for both professionals and DIY enthusiasts.
There are several types of miter saws, such as standard, compound, sliding compound, and dual-bevel models. Each type offers unique features for specific cutting tasks. The main components include the base, table, fence, blade, bevel scale, and safety guard. Understanding these parts and their functions is key to operating the tool safely and achieving accurate cuts every time.
Understanding Miter Saw Parts and Functions
Before you learn how to use a miter saw effectively, it is important to understand its main parts and how each one functions. Knowing the purpose of every component helps you operate the tool safely and make accurate cuts.
Base
The base provides stable support for the entire miter saw and holds the workpiece securely during cutting. When learning how to use miter saw, it’s important to understand that a strong, level base is essential for accuracy and safety. It keeps the tool steady during operation, reduces vibration, and ensures every cut is precise and consistent.
Table
The table is the flat surface where you place your workpiece. It provides support for the material as you cut. Some tables have extension wings to hold longer boards securely.
Fence
The fence is the vertical support at the back of the table. It keeps the material in place and guides it at a 90-degree angle to the blade. When you learn how to use a miter saw for angled cuts, the fence helps maintain precision.
Miter Scale and Handle
The miter scale allows you to set the cutting angle. The handle locks the saw at your chosen angle, making it possible to cut frames, moldings, and other angled joints accurately.
Bevel Scale and Adjustment Knob
The bevel scale lets you tilt the saw blade to the left or right for bevel cuts. The adjustment knob secures the desired tilt angle. These controls are essential when learning how to use a miter saw for compound cuts.
Blade and Blade Guard
In a miter saw, the blade is the tool’s primary element that performs all cutting tasks. It rotates at high speed to make clean, precise cuts. The blade guard covers the blade when it is not in use and automatically retracts during cutting to protect the user from injury.
Trigger and Handle
The trigger is built into the handle and controls the saw’s operation. You press it to start the blade and release it to stop. Always ensure the trigger works smoothly before beginning a project.
Dust Port or Collection System
The dust port helps keep your workspace clean by directing sawdust away from the cutting area. Many users connect it to a vacuum or dust collector for better visibility and safety.
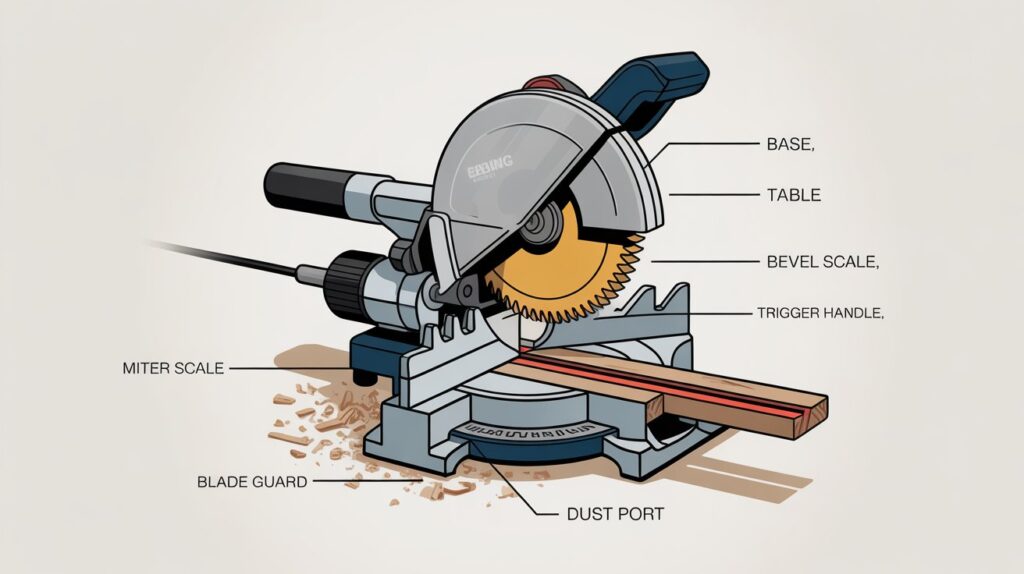
Understanding these parts is the first step toward mastering how to use a miter saw safely and efficiently. Each component plays a vital role in achieving accuracy and control during cutting.
Adding a labeled diagram of a miter saw here would be very helpful. It can visually identify each part discussed, making the explanation easier for beginners to follow.
Inspect and Set Up the Saw
Before you begin any cutting project, it is essential to inspect and set up your miter saw correctly. Understanding how to use miter saw safely starts with careful preparation. Proper inspection and setup not only ensure accuracy but also prevent accidents and extend the life of your tool.
1. Check the Blade
Start by examining the saw blade. Make sure it is sharp, clean, and free from damage or rust. A dull or bent blade can cause rough cuts and increase the risk of kickback. Ensure the blade is securely tightened before turning on the saw.
2. Inspect Safety Features
Confirm that the blade guard moves smoothly and covers the blade completely when the saw is raised. Test the trigger switch to make sure it operates properly and does not stick. Inspect the power cord carefully to ensure there are no cracks, cuts, or damaged areas before turning on the saw.. If you notice damage, replace it before use.
3. Align the Fence and Table
Place a straight edge against the fence to verify that it is square with the saw blade. Misalignment can lead to inaccurate cuts. Adjust the fence if necessary, following the manufacturer’s instructions. The table should be level and clean, free from debris or dust that could interfere with the workpiece.
4. Adjust the Miter and Bevel Angles
Set the miter angle using the miter scale on the saw base. Make sure the locking handle is tight once the desired angle is set. For bevel cuts, tilt the blade using the bevel adjustment knob and verify the angle with a square or digital gauge. Learning how to use miter saw includes understanding how to calibrate these angles for precise results.
5. Secure the Saw in Place
If you are working on a bench or stand, ensure the miter saw is firmly mounted. Use bolts or clamps to prevent movement or vibration during cutting. Stability is crucial for maintaining accuracy and safety.
6. Power On and Test the Saw
Before cutting, plug in the saw and perform a short test run without any material. Listen for unusual noises and watch for excessive vibration. If the saw runs smoothly, it is ready for use.
7. Prepare for Dust Collection
Attach a vacuum or dust bag to the saw’s dust port to keep your workspace clean. Sawdust can affect visibility and cutting precision, so maintaining a clear line of sight is important.
Setting up your tool properly is one of the most important steps when learning how to use miter saw efficiently. A well-inspected and calibrated saw ensures smoother operation, cleaner cuts, and a safer working experience.
Safety Precautions Before Using a Miter Saw
Before learning how to use miter saw effectively, it is essential to understand and follow proper safety precautions. A miter saw is a powerful tool capable of making precise cuts, but if used carelessly, it can cause serious injury. Taking a few simple safety steps ensures that you work confidently and protect yourself at all times.
1. Wear Proper Safety Gear
Always wear safety goggles to protect your eyes from flying debris and sawdust. Use ear protection to reduce noise exposure, and wear a dust mask if you are cutting indoors or for long periods. Avoid loose clothing, jewelry, or long hair that could get caught in the moving blade. Gloves can provide a better grip, but make sure they are snug-fitting and do not interfere with your control.
2. Inspect the Miter Saw Before Use
Before starting any project, check that the saw is in good working condition. Make sure the blade is sharp and securely tightened, and the blade guard moves freely. Inspect the power cord for any damage and ensure all switches and safety features are functioning correctly. This step is an important part of learning how to use miter saw safely and efficiently.
3. Secure Your Workspace
Set up your miter saw on a flat, stable surface. Keep the surrounding area clear of tools, cords, and scrap material to avoid tripping hazards. Make sure there is enough space to support the material you are cutting. Use proper lighting to clearly see your cut lines.
4. Use Clamps and Supports
Always secure the workpiece firmly against the fence before cutting. Use clamps when needed to keep it from shifting. If you are cutting long boards, use additional supports or extension wings to hold the material level. Unstable or loose pieces can lead to inaccurate cuts and possible kickback.
5. Keep Hands Away from the Blade
Always keep your hands at least six inches away from the blade while cutting. Use a push stick or hold the material well to the side. Never reach around or behind the blade while it is spinning. Wait until the blade has come to a complete stop before lifting it or removing the cut piece.
6. Start and Stop Safely
When turning on the saw, allow the blade to reach full speed before making contact with the material. After the cut, release the trigger and wait until the blade stops completely before raising it. This practice prevents splintering and reduces the risk of accidents.
7. Stay Focused and Avoid Distractions
Never use a miter saw if you are tired, distracted, or under the influence of alcohol or medication. Concentration is key to safe operation. Always plan your cuts before starting the saw and never rush through your work.
Following these precautions is a vital part of mastering how to use miter saw correctly. By prioritizing safety, you not only protect yourself but also achieve more accurate and professional-quality results.
How to Use Miter Saw: Step-by-Step Guide
Learning how to use miter saw properly is essential for achieving precise, professional-quality cuts while maintaining safety. Whether you are a beginner or an experienced DIY enthusiast, following a systematic process ensures accurate results and extends the lifespan of your tool. This step-by-step guide will help you operate your miter saw confidently and efficiently.
1. Mark and Measure Your Material
Start by measuring your workpiece accurately using a measuring tape and pencil. Mark the exact point where you want to cut. Double-check your measurements before cutting to avoid wasting material. Accuracy in this step determines the overall quality of your project.
2. Adjust the Miter and Bevel Angles
Set the desired miter angle using the miter scale at the base of the saw. For angled cuts, unlock the miter handle and rotate the saw table to your chosen degree. If your project requires a bevel cut, tilt the blade using the bevel adjustment knob. Understanding how to use miter saw angles correctly helps achieve clean joints, especially for molding or framing work.
3. Align the Material with the Blade
Place the board flat on the saw table, keeping it firmly against the fence for stability. Align the cutting mark with the saw blade while the saw is turned off. This ensures that the blade will cut exactly where intended. Using clamps to secure the material can improve accuracy and safety.
4. Power On and Lower the Blade
Turn on the saw and allow the blade to reach full speed before making contact with the material. Lower the handle slowly and steadily through the mark. Let the blade do the work—do not force it. Maintain a consistent, controlled motion to ensure a clean cut without splintering.
5. Complete the Cut and Raise the Blade
Once the cut is finished, release the trigger and wait for the blade to stop completely before raising it. Never lift the saw while the blade is still spinning. After the blade stops, carefully remove the cut piece and inspect the edge for smoothness.
6. Repeat for Multiple Cuts
If your project requires several identical cuts, use a stop block to maintain consistent measurements. This technique saves time and ensures uniformity across all pieces.
7. Finishing Touches and Cleanup
After cutting, inspect each piece for precision. Lightly sand any rough edges if necessary. Turn off and unplug the saw when finished, and clear sawdust or debris from the workspace. A clean environment helps maintain cutting accuracy and prevents tool wear.
When learning how to use miter saw, remember that precision comes from patience and control. Never rush through the process, and always verify your settings before each cut. With proper technique, your miter saw will deliver accurate, professional results for framing, molding, flooring, and other woodworking projects.
Setting Up Your Miter Saw
Before you start cutting, it’s important to learn how to set up your miter saw properly. A correct setup ensures accurate cuts, prevents mistakes, and keeps you safe while working. Whether you’re a beginner or an experienced user, following these steps will help you get the best performance from your tool.
Begin by placing your miter saw on a stable, flat surface. A sturdy workbench or a dedicated miter saw stand works best. Make sure there’s enough space on both sides of the saw to support long pieces of material. Plug the saw into a grounded power outlet and check that the cord is free from any obstruction.
Next, inspect the blade. Ensure that the blade is sharp, clean, and securely tightened. Dull or loose blades can lead to rough cuts or even accidents. If you’re cutting different materials, confirm that you have the correct blade type installed.
Now, check the alignment of your saw. The fence should be square to the blade, and the miter and bevel angles should read accurately on their respective scales. You can use a carpenter’s square to verify this alignment. Adjust the settings if needed to make sure your cuts are precise.
Before making any cuts, test the movement of the saw arm. It should move smoothly up and down without friction or resistance. Also, confirm that the safety guard operates correctly and automatically covers the blade when lifted.
Once everything is aligned, secure your workpiece. Use clamps or hold-downs to keep the material steady while cutting. This reduces vibration and helps you achieve cleaner results.
Finally, always double-check your measurements before turning on the saw. Make a few test cuts on scrap wood to confirm the accuracy of your setup before starting your main project.
Tips for Accurate and Clean Cuts
Getting smooth, precise results depends on how well you handle your tool and how much attention you give to small details. Knowing how to use a miter saw correctly will make a big difference in the quality of your cuts. Here are practical tips to help you achieve accurate and clean results every time you work.
Start by choosing the right blade for your project. A fine-tooth blade is ideal for clean, smooth cuts in wood trim, molding, or laminate. For rough cuts or thicker materials, use a blade designed for framing or general-purpose cutting. Always make sure the blade is sharp and clean, as dull or dirty blades can cause splintering and uneven edges.
Next, secure your workpiece properly. Clamping the material tightly against the fence and table prevents movement and vibration during the cut. Even a slight shift can throw off your angle or leave a rough surface. A steady workpiece helps the saw perform with maximum accuracy.
Mark your cut lines clearly with a pencil or fine-tip marker. Align the blade edge precisely with the mark before lowering the saw. It’s best to approach the cut slowly and let the saw’s blade do the work. Forcing the saw through the material can cause tear-out or burn marks.
Maintain a consistent, gentle cutting speed. Rapid movements or hesitation can lead to rough edges. Always keep a firm grip on the handle and make sure your stance allows full control of the saw throughout the cut.
Another useful tip is to support long boards on both sides of the saw. This keeps the material level and reduces the chance of binding or uneven cuts. Using extension supports or a miter saw stand can make this much easier.
Lastly, inspect your saw regularly. Keeping the blade, fence, and table clean from sawdust helps maintain precision. Adjust your saw’s angles and calibration as needed to ensure they stay accurate over time.
Common Mistakes to Avoid When Using a Miter Saw
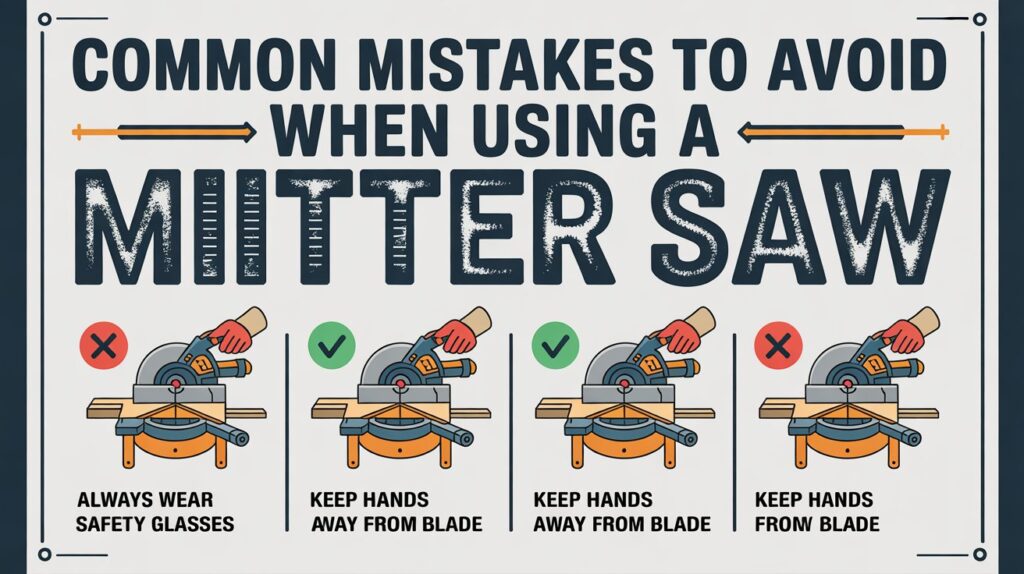
Learning how to use a miter saw the right way helps you work safely and achieve precise results. However, even small mistakes can lead to inaccurate cuts, wasted materials, or safety risks. Here are eight common mistakes to avoid when using a miter saw.
1. Ignoring Safety Precautions
One of the most common mistakes is skipping safety gear. Always wear safety goggles, ear protection, and avoid loose clothing or jewelry. Never operate the saw without the blade guard in place, and make sure the work area is clean and stable.
2. Using a Dull or Wrong Blade
A dull blade can cause rough cuts, burning, and even kickback. Similarly, using the wrong blade type for the material can damage both your saw and the workpiece. Always check that the blade is sharp, clean, and appropriate for the job.
3. Failing to Secure the Workpiece
Cutting without properly clamping or holding the material firmly against the fence can result in movement during cutting. This leads to inaccurate angles and unsafe cutting conditions. Always secure your workpiece before starting the saw.
4. Measuring or Marking Incorrectly
Inaccurate measurements are a major reason for wasted material. Double-check your markings and make sure the blade aligns perfectly with your cut line before lowering the saw. Precision begins with proper measurement.
5. Forcing the Saw Through the Material
Pushing the saw too fast can cause rough edges, splinters, and strain on the motor. The blade should glide smoothly through the material. Let the saw’s power do the work and maintain a steady, controlled motion.
6. Cutting Too Close to the Edge
Making cuts too close to the edge of a board can cause the wood to split or break. Always leave enough space between the cut line and the edge for the blade to move freely and safely.
7. Neglecting Regular Maintenance
Dust buildup and loose parts can affect accuracy and performance. Clean your miter saw regularly, tighten any loose bolts, and check blade alignment often. Proper maintenance extends the life of your saw and ensures consistent results.
8. Skipping Test Cuts
Many beginners make the mistake of starting on their main material without testing first. Always perform a few test cuts on scrap wood to check alignment, angle, and blade condition before beginning your actual project.
Maintenance and Blade Care
Knowing how to use a miter saw includes regular maintenance and blade care. Follow these short, clear steps to keep your saw accurate, safe, and long-lasting.
- Unplug the saw and wear safety gloves and goggles before any maintenance.
- Remove the blade guard and take off the blade following the manufacturer’s instructions.
- Clear accumulated sawdust and resin from the table, fence, motor housing, and blade guard with a brush and compressed air.
- Inspect the blade for chipped or missing teeth, excessive wobble, or burn marks; replace the blade if any defects appear.
- If the blade is only slightly dull, consider professional sharpening; do not attempt to sharpen carbide-tipped blades at home.
- Check and tighten the arbor nut and all accessible fasteners to the torque recommended by the manufacturer.
- Verify that the fence and miter/bevel stops are square and correctly calibrated; adjust as needed for accurate cuts.
- Lightly lubricate pivot points and sliding rails with a dry lubricant or manufacturer-approved product; avoid oil on the blade or table surface.
- Reinstall the blade, ensure the blade guard moves freely, plug in the saw, and make a test cut on scrap material to confirm smooth operation and accuracy.
- Perform a basic cleaning and inspection after each major project and a full maintenance check every 3–6 months depending on use.
Following these steps will improve cut quality, reduce risk, and extend the life of your saw—essential parts of learning how to use a miter saw well.
Miter Saw Accessories Worth Using
When learning how to use a miter saw, having the right accessories can make your work more accurate, efficient, and safe. The right add-ons not only improve cutting precision but also protect your equipment and reduce fatigue during long projects. Below are some of the most useful miter saw accessories every woodworker or DIY user should consider.
Miter Saw Stand
A sturdy stand is one of the first accessories you should get for your miter saw. It provides a stable surface and ensures the saw stays level while cutting. Many stands come with adjustable supports and wheels, making them portable and easy to set up at any job site.
Clamps and Hold-Downs
Clamps keep your material steady while cutting, which improves accuracy and safety. They prevent wood movement that can cause uneven cuts or kickback. Some miter saws include built-in clamps, but extra adjustable ones can make a big difference, especially for wider or longer boards.
Laser or LED Cutting Guide
A laser or LED guide projects a clear line on your workpiece, showing exactly where the blade will cut. This accessory is particularly useful for beginners learning how to use a miter saw, as it helps achieve clean, precise cuts without guesswork.
Dust Collection System
Miter saws create a large amount of sawdust, which can affect visibility and air quality. A dust bag or vacuum attachment keeps your workspace cleaner and healthier. It also helps maintain the saw’s performance by preventing dust buildup around the motor and blade.
Extension Wings
If you often work with long boards or trim pieces, extension wings are essential. They provide extra support on both sides of the saw, helping you keep materials balanced and aligned. This accessory greatly improves accuracy and reduces cutting errors.
Stop Blocks
Stop blocks help you make repeated cuts of the same length quickly and accurately. They are a must-have when doing production-style or framing work where consistency is key.
Blade Upgrades
Not all blades are the same. Investing in high-quality blades suited for your material—such as fine-tooth blades for trim work or carbide-tipped blades for hardwood—can make your cuts smoother and extend your saw’s life.
Work Light Attachment
A bright work light improves visibility, especially in low-light areas. It helps you see the cut line clearly, ensuring accuracy and reducing mistakes.
Adding these accessories will not only enhance your understanding of how to use a miter saw but also elevate the quality of your projects. For the best experience, choose durable, compatible accessories that match your saw model and project type.
Maintenance and Blade Care
Proper maintenance is one of the most important parts of learning how to use a miter saw effectively. A clean and well-maintained saw delivers smoother, safer, and more accurate cuts. Follow these steps to keep your miter saw in excellent condition:
- Unplug Before Maintenance
Always disconnect the miter saw from the power source before cleaning or handling the blade. This simple step ensures complete safety and prevents accidental startups. - Clean After Every Use
After finishing your cuts, remove sawdust and debris from the blade, table, and fence. Use a soft brush or compressed air to clear tight spaces. Keeping your saw clean prevents buildup that can affect accuracy. - Inspect the Blade Regularly
Check the blade teeth for dullness, chips, or missing tips. A dull blade requires more pressure and can cause burn marks or rough cuts. Replace or sharpen it as soon as you notice wear. - Check Blade Alignment
Proper alignment between the blade and fence ensures accurate cuts. If your cuts seem uneven or angled incorrectly, recalibrate the saw following the manufacturer’s guide. - Lubricate Moving Parts
Apply a light machine oil to pivot points and moving joints to keep them smooth. Avoid using too much lubricant, as excess oil can attract dust and sawdust. - Tighten Screws and Bolts
Vibrations during cutting can loosen screws and bolts. Regularly inspect and tighten all connections, especially around the blade guard, fence, and handle. - Replace the Blade When Needed
If the saw struggles to cut or burns the wood, it’s time for a new blade. Use a high-quality replacement that matches your saw’s specifications. - Store in a Clean, Dry Area
When not in use, keep your miter saw covered and away from moisture or dust. This prevents rust and protects the motor and electrical parts. - Check the Power Cord
Inspect the power cord for any damage or fraying. Replace it immediately if it shows signs of wear to avoid electrical hazards. - Follow Manufacturer’s Instructions
Always refer to the manufacturer’s manual for specific maintenance schedules, blade types, and cleaning products recommended for your model.
Troubleshooting Common Issues
Uneven or Inaccurate Cuts
If your miter saw is producing uneven or inaccurate cuts, the first step is to check the alignment of the fence and blade. Over time, vibration and frequent use can cause slight misalignment. Recalibrate the miter and bevel angles according to the manufacturer’s guide. Always verify that the material is flat against the fence before cutting. Regular calibration is an essential part of learning how to use miter saw effectively.
Blade Wobble or Vibration
A wobbling blade can affect both accuracy and safety. This usually happens when the blade is loose, warped, or dirty. Turn off the power, remove the blade, and clean it thoroughly. If the blade is bent or damaged, replace it immediately. Using a high-quality, sharp blade is critical for smooth and consistent cuts.
Burn Marks on the Wood
Burn marks often occur when the blade is dull or moving too slowly through the material. To prevent this, check that you’re using the right blade for your material type. Keep a steady, even feed rate—don’t force the cut. A sharp, clean blade will cut faster and reduce friction.
Material Slipping During the Cut
If the workpiece moves during cutting, it can result in inaccurate angles or dangerous kickback. Always use a clamp or hold-down system to secure the material firmly against the fence. Properly securing your material is a key step in understanding how to use miter saw safely and efficiently.
Saw Not Starting or Power Fluctuations
If your miter saw does not start, check the power cord and outlet first. Make sure the safety switch is properly engaged. For battery-powered saws, ensure the battery is fully charged. If the motor hesitates or loses power during operation, it may indicate a worn-out motor brush or faulty wiring. In such cases, contact a qualified technician for inspection.
Dust Build-Up and Poor Visibility
Excess dust can reduce visibility and accuracy while cutting. Use a vacuum or dust collection system to keep the workspace clean. Many modern miter saws come with a dust port—connect it to a shop vac for best results. Clean the saw housing regularly to maintain smooth operation.
Blade Not Cutting Through Material Completely
If the blade stops short or doesn’t fully cut through the material, the cutting depth may be incorrectly set. Check the depth adjustment and ensure the blade is the proper size for the saw. Also, verify that the blade teeth are sharp and facing in the correct direction.
Motor Overheating
Overheating can occur if the saw is used continuously for long periods or if the motor is dirty. Allow the motor to cool between long cuts and clean the vents to improve airflow. Avoid overloading the saw by cutting too quickly or forcing thick materials.
Loud Noise or Unusual Sounds
Unusual grinding or rattling sounds often indicate loose components or a damaged bearing. Turn off the saw immediately and inspect all screws and bolts. Tighten any loose parts and replace damaged components as needed. Regular maintenance keeps your miter saw running smoothly and safely.
Inconsistent Bevel or Miter Angles
If the saw doesn’t lock correctly at preset angles, inspect the detent plate and locking mechanism. Dust or debris buildup can prevent proper locking. Clean the area and test the detent stops for accuracy. Ensuring precise angles is an important part of mastering how to use miter saw for professional-quality results.
Conclusion
Learning how to use miter saw correctly is an essential skill for anyone interested in woodworking, home renovation, or DIY projects. By understanding the parts of the tool, following safety guidelines, and practicing step-by-step cutting techniques, you can achieve precise and professional results with every project. Regular maintenance, blade care, and troubleshooting will also keep your saw performing efficiently for years to come.
Whether you are a beginner making your first cuts or an experienced craftsman refining your technique, a miter saw offers versatility and accuracy that few tools can match. Take time to practice safely, choose the right accessories, and always work with confidence.
If you’re ready to upgrade your tools or start your next project, explore cutterzone.com collection of high-quality miter saws and accessories to find the perfect option for your workspace.
FAQs About Using a Miter Saw
Q.1 Can beginners use a miter saw safely?
Yes, beginners can use a miter saw safely with the right precautions. Before starting, read the user manual carefully and understand how to use miter saw controls, including the safety lock and blade guard. Always wear protective gear such as goggles and gloves, keep hands away from the blade path, and secure the workpiece firmly before cutting. Starting with simple straight cuts is the best way to build confidence and control.
Q.2 What is the best saw for home projects?
For most home projects, a 10-inch compound miter saw is ideal. It offers a good balance between cutting capacity and portability. This type of saw can handle trimming, molding, and DIY furniture work easily. If you need to cut wider boards or work on professional projects, consider upgrading to a sliding compound miter saw for extra versatility.
Q.3 What size blade should I use?
The most common blade sizes are 10 inches and 12 inches. A 10-inch blade is perfect for light to medium tasks such as picture frames and baseboards, while a 12-inch blade is better for thicker or wider materials. Make sure the blade size matches your saw’s specifications and choose a fine-tooth blade for smooth, clean finishes.
Q.4 How often should I replace or sharpen the blade?
The frequency depends on how often you use the saw and the type of material you cut. For regular DIY use, check the blade every few months for dullness or damage. If you notice burn marks, rough edges, or excessive vibration, it’s time to sharpen or replace the blade. A sharp blade ensures cleaner cuts and extends the life of your saw.
Q.5 Why is my miter saw cutting unevenly?
Uneven cuts usually happen because of misalignment, a dull blade, or loose material. Recheck that the blade and fence are square, and tighten the workpiece firmly before each cut. Calibrate the miter and bevel angles as recommended in the manual. Learning how to use miter saw properly with regular maintenance helps prevent these cutting issues.