
Introduction
A Track Saw guide can help beginners and woodworkers understand how this versatile cutting tool works and how to use it correctly. A track saw combines a powerful circular saw with a guide rail to produce straight, controlled, and accurate cuts. It is particularly useful for plywood, sheet goods, solid wood, and other woodworking materials. In this guide, we will cover its main parts, setup, cutting techniques, safety practices, common mistakes, and maintenance
Table of Contents
What Is a Track Saw?
A Track Saw guide is useful for understanding how this specialized woodworking tool makes accurate, straight cuts. A track saw is a power saw designed to cut materials such as plywood, boards, and other sheet goods with greater precision than a standard circular saw. It uses a guide rail, also called a track, to keep the saw moving in a straight line during the cut.
Unlike a traditional circular saw, a track saw usually has a plunge-cut design. This allows the blade to move down into the material at the point where the cut needs to begin. The guide rail helps control the saw’s movement, making it easier to produce clean and consistent cuts.
How Does a Track Saw Work?
The saw is placed on a guide rail positioned along the desired cutting line. When the saw is switched on, the blade rotates while the user moves the saw along the track. The rail keeps the tool aligned throughout the cut, which helps improve cutting accuracy.
Many track saws also include a splinter guard along the edge of the guide rail. This helps reduce tearing and splintering, particularly when cutting plywood and other sheet materials.
Track Saw vs. Circular Saw
A regular circular saw can make straight cuts, but it generally requires a separate guide or careful manual control to maintain accuracy. A track saw is designed to work with its guide rail, making precise straight cuts easier to achieve.
A track saw is especially useful when working with large sheets of plywood, panels, and other materials that need long, clean cuts. Its controlled movement and plunge-cut capability make it a practical tool for both professional woodworkers and beginners.
How Does a Track Saw Work?
A track saw works by combining a rotating circular saw blade with a straight guide rail. The rail controls the movement of the saw, allowing it to travel along a precise path while cutting wood and sheet materials. Its plunge-cut design also allows the blade to enter the material at a specific point instead of requiring the cut to begin at an edge.
1. Positioning the Guide Rail
The first step is to place the guide rail along the intended cutting line. The rail provides a straight path for the saw and helps prevent unwanted movement during the cut. For longer cuts, multiple rails can be connected to create a continuous cutting path.
2. Setting the Cutting Depth
Before starting the saw, the cutting depth should be adjusted according to the thickness of the material. The blade should extend slightly below the workpiece rather than being set unnecessarily deep. Correct depth adjustment improves control and helps reduce unnecessary blade exposure.
3. Starting the Plunge Cut
A track saw uses a plunge-cut saw mechanism that allows the blade to move downward into the material. The user positions the saw at the starting point, activates the motor, and gradually lowers the blade into the workpiece.
4. Moving Along the Track
Once the blade is fully engaged in the material, the saw is pushed forward along the guide rail. The rail keeps the saw aligned, helping produce straight cuts with consistent accuracy. The user should maintain steady pressure instead of forcing the tool through the material.
5. Cutting Through the Material
As the saw moves along the rail, the circular saw blade removes material and creates the desired cut. The blade type and tooth configuration should match the material being cut. A suitable blade can improve the quality of the finished edge and reduce splintering.
6. Using the Splinter Guard
Many guide rails include a splinter guard along the cutting edge. It helps support the material fibers close to the blade, reducing tear-out during the cut. This is particularly useful when making clean cuts in plywood and other sheet goods.
7. Completing the Cut
The saw continues along the guide rail until the blade has passed completely through the workpiece. The user should keep the saw stable and allow the blade to stop before lifting it away from the material.
8. Why the System Provides Accurate Cuts
The combination of a guide rail, controlled plunge mechanism, and stable saw base makes the system effective for precision cutting. It is especially useful for large panels, plywood cutting, furniture components, and other woodworking tasks where maintaining a straight cutting path is important.
Main Parts of a Track Saw
Understanding the main components of a track saw makes it easier to use the tool correctly and maintain its cutting performance. Each part has a specific function that helps the saw produce accurate and controlled cuts.
1. Motor
The motor provides the power needed to rotate the blade. A powerful and reliable motor allows the saw to cut through materials such as plywood, solid wood, and other sheet goods efficiently.
2. Circular Saw Blade
The circular saw blade is the cutting component that removes material as the saw moves forward. Different blades have different tooth designs, so selecting the correct blade is important for clean and accurate cuts.
3. Guide Rail
The guide rail provides a straight path for the saw. It helps keep the tool aligned during cutting and is one of the main features that separates this system from a conventional circular saw.
4. Plunge Mechanism
The plunge mechanism allows the blade to move downward into the workpiece. This makes the saw suitable for starting cuts at specific points instead of always beginning from the edge of the material.
5. Depth Adjustment
The depth adjustment controls how far the blade extends below the base of the saw. Setting the correct depth helps improve control and reduces unnecessary blade exposure.
6. Bevel Adjustment
The bevel adjustment allows the saw to make angled cuts. Depending on the model, the angle can be adjusted for different woodworking applications and project requirements.
7. Base Plate
The base plate supports the saw as it moves along the guide rail. It helps keep the tool stable and allows smooth movement during the cutting process.
8. Splinter Guard
The splinter guard is positioned along the cutting edge of the guide rail. It helps reduce tear-out and produces cleaner edges, especially when working with plywood and other sheet materials.
9. Safety Features
Safety features may include a trigger lock, blade guard, electronic brake, and other controls designed to reduce accidental operation and improve user control.
10. Power Cord or Battery
Depending on the model, the saw may use a power cord or a rechargeable battery. Both systems provide the energy required to operate the motor and complete the cut.
How to Set Up a Track Saw
Proper setup is important for achieving accurate cuts and maintaining control during woodworking projects. A few simple adjustments can help ensure that the saw, guide rail, and workpiece are ready before cutting begins.
1. Prepare the Work Area
Place the material on a stable and properly supported surface. Make sure the cutting path is clear and that the blade will not contact the workbench or another object underneath the material.
2. Select the Correct Blade
Choose a blade that matches the material and type of cut you need to make. A suitable blade can improve cutting accuracy, edge quality, and overall cutting performance.
3. Mark the Cutting Line
Measure the workpiece carefully and mark the required cutting position. Accurate measurements make it easier to position the guide rail correctly before starting the cut.
4. Position the Guide Rail
Place the guide rail along the cutting line. Align its edge with the position where the blade needs to travel. Check the measurement at several points to make sure the rail is correctly positioned.
5. Secure the Guide Rail
Prevent the rail from moving while cutting. Some systems use non-slip surfaces, while others can be secured with clamps when additional stability is needed.
6. Set the Cutting Depth
Adjust the cutting depth according to the thickness of the material. The blade should extend slightly below the workpiece. Avoid setting the blade much deeper than necessary.
7. Adjust the Bevel Angle
For a standard straight cut, keep the bevel setting at the appropriate zero-degree position. If an angled cut is required, adjust the bevel according to the desired angle and check the setting before cutting.
8. Check the Splinter Guard
Inspect the splinter guard along the guide rail and make sure it is properly positioned. A correctly aligned guard helps reduce splintering and improves the quality of the finished edge.
9. Test the Saw Movement
Place the saw on the rail and move it back and forth without turning it on. Make sure it moves smoothly and remains properly engaged with the track.
10. Make the Cut
Once everything is properly adjusted, position the saw at the starting point. Start the motor, engage the blade carefully, and move the saw steadily along the rail. Avoid forcing the tool and maintain consistent control throughout the cut.
How to Use a Track Saw for Straight Cuts
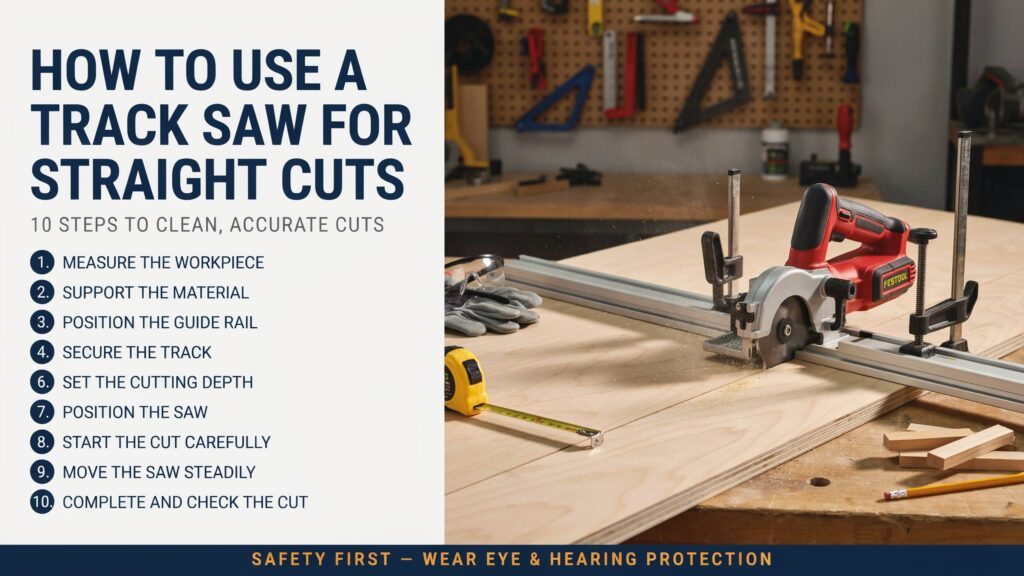
A track saw is designed to make accurate straight cuts when the saw and guide rail are set up correctly. Following a consistent process helps improve control, reduce mistakes, and produce clean edges.
1. Measure the Workpiece
Measure the material carefully and mark the exact location of the cut. Double-check the measurement before positioning the guide rail to avoid cutting in the wrong place.
2. Support the Material
Place the workpiece on a stable surface with enough support underneath. Make sure the material will not move during cutting and that the blade has a clear path through the entire cut.
3. Position the Guide Rail
Place the guide rail along the marked cutting line. Measure from the edge of the material to the rail at more than one point to confirm that it is properly aligned.
4. Secure the Track
Keep the rail firmly in position before starting the cut. A non-slip surface can provide stability, while clamps may be useful when additional support is required.
5. Set the Cutting Depth
Adjust the blade depth according to the thickness of the material. The blade should extend slightly below the workpiece rather than unnecessarily deep into the supporting surface.
6. Check the Blade
Use a suitable circular saw blade for the material. A clean and properly installed blade helps produce smoother edges and improves cutting accuracy.
7. Position the Saw
Place the saw onto the guide rail and check that it moves smoothly. Keep the saw properly engaged with the track before turning on the motor.
8. Start the Cut Carefully
Switch on the saw and allow the blade to reach its operating speed. Engage the blade gradually and maintain a firm grip while beginning the cut.
9. Move the Saw Steadily
Push the saw forward along the guide rail at a controlled speed. Do not force the tool or make sudden movements, as consistent movement helps maintain straight cuts.
10. Complete and Check the Cut
Continue moving the saw until the cut is completely finished. Allow the blade to stop before removing the saw from the rail, then inspect the edge for accuracy and splintering.
Track Saw Cutting Techniques for Different Materials
Different materials require slightly different cutting approaches. Choosing the right blade, adjusting the cutting depth, and using the correct technique can improve the results when working with common woodworking materials.
1. Plywood Cutting
For plywood cutting, use a blade designed for producing clean edges with minimal tear-out. Keep the guide rail firmly positioned and move the saw steadily through the sheet. A splinter guard can also help produce a cleaner edge.
2. Cutting Sheet Goods
Large sheet goods such as MDF, particleboard, and laminated panels can be difficult to handle with a standard saw. A guide rail provides better control and helps maintain a straight cutting path across the material.
3. Solid Wood
When cutting solid wood, select a blade suitable for the wood species and desired finish. Support longer boards properly to prevent movement or bending during the cut.
4. Hardwood
Hardwoods generally require a sharp, high-quality blade and controlled feed speed. Avoid pushing the saw too quickly because excessive force can affect precision cutting and produce a rougher edge.
5. Softwood
Softwoods are usually easier to cut, but they can still splinter if the blade is dull or unsuitable. Use a sharp blade and maintain a steady movement along the guide rail.
6. MDF
MDF produces a significant amount of fine dust during cutting. Use appropriate dust collection and personal protection while maintaining a steady cutting speed. A suitable blade helps achieve a smoother edge.
7. Particleboard
Particleboard can chip easily, particularly on its surface. A fine-tooth blade and controlled feed rate can help reduce chipping and improve the finished cut.
8. Laminated Panels
When cutting laminated materials, use a sharp blade designed for clean cuts. Keep the saw stable and avoid sudden movements that could damage the finished surface.
9. Crosscuts and Rip Cuts
The same basic setup can be used for both crosscuts and rip cuts, but the direction and position of the cut will vary according to the material and project. Always ensure that the workpiece is properly supported.
10. Bevel Cuts
For angled cuts, adjust the saw’s bevel setting before starting. Check the angle carefully and make sure the guide rail remains stable. A controlled feed rate helps maintain accuracy throughout the bevel cut.
Track Saw Guide Rail: How to Get Accurate Cuts
A properly positioned guide rail is essential for producing precise and consistent cuts. It provides a stable path for the saw and helps prevent the tool from moving away from the intended cutting line.
1. Measure the Cutting Line
Start by measuring the workpiece carefully and marking the required cutting position. Accurate measurements provide a reliable reference for positioning the rail.
2. Position the Guide Rail
Place the guide rail along the cutting line and check its position at both ends. Make sure the rail is aligned correctly before starting the cut.
3. Check the Saw Offset
The distance between the edge of the guide rail and the actual blade position can vary between saw systems. Check this distance before cutting so the rail can be positioned accurately.
4. Keep the Rail Stable
A rail that moves during cutting can ruin the accuracy of the cut. Use the rail’s non-slip surface or suitable clamps when additional stability is required.
5. Connect Multiple Rails Correctly
For long cuts, multiple rails can be joined together. Make sure the connection is straight and secure so the saw can travel smoothly across the entire cutting path.
6. Check the Cutting Depth
Set the blade depth according to the thickness of the material. Correct depth adjustment helps the blade pass through the workpiece without unnecessary exposure.
7. Use a Suitable Blade
A sharp circular saw blade designed for the material can improve the quality of the cut. The correct tooth configuration is particularly important when working with plywood and other sheet goods.
8. Maintain Steady Movement
Move the saw along the rail at a consistent speed. Avoid pushing too quickly or forcing the tool, as uneven movement can affect cutting accuracy.
9. Use the Splinter Guard
The splinter guard helps reduce tear-out along the cut line. It is especially useful when a clean edge is important for finished woodworking projects.
10. Check the Rail Before Every Cut
Before cutting, confirm that the rail is correctly positioned, stable, and free from debris. A quick inspection can prevent inaccurate cuts and improve overall precision cutting.
Track Saw Safety Tips
Safe operation is important whenever a power saw is used. Proper preparation, correct handling, and appropriate protective equipment can help reduce the risk of accidents during woodworking.
1. Read the Manufacturer’s Instructions
Read the operating instructions before using the saw. Pay attention to the controls, blade installation, safety features, and recommended operating procedures.
2. Wear Appropriate Protection
Use safety glasses to protect your eyes from flying particles. Hearing protection and suitable respiratory protection may also be necessary depending on the material, environment, and dust produced.
3. Inspect the Saw Before Use
Check the blade, power cord or battery, guard, guide rail, and other components before starting. Do not operate the saw if an important component is damaged or malfunctioning.
4. Secure the Workpiece
Keep the material firmly supported so it cannot shift during cutting. Unstable material can cause the saw to move unexpectedly and affect control.
5. Keep Your Hands Away From the Blade
Never place your hands near the cutting path. Maintain a safe grip on the saw using the designated handles while keeping your body away from the blade.
6. Check the Cutting Path
Make sure there are no hidden nails, screws, wires, or other objects in the material before cutting. The blade should have a clear path through the workpiece.
7. Set the Correct Cutting Depth
Adjust the blade so it extends only as far below the material as necessary. Excessive blade exposure can increase the risk of contact with the supporting surface.
8. Keep the Guide Rail Secure
Make sure the guide rail cannot move during the cut. A stable rail helps maintain control and supports accurate cutting.
9. Do Not Force the Saw
Allow the blade to cut at its normal rate. Pushing the tool too aggressively can reduce control and place unnecessary strain on the motor and blade.
10. Wait for the Blade to Stop
After completing the cut, keep the saw stable until the blade has completely stopped rotating. Do not lift or move the saw while the blade is still spinning.
11. Maintain a Safe Body Position
Stand in a balanced position and keep your body away from the direct cutting path. Avoid reaching across the saw while it is operating.
12. Disconnect Power Before Maintenance
Switch off and disconnect the power source before changing the blade, cleaning the saw, or performing maintenance. This prevents accidental startup during servicing.
Common Track Saw Mistakes and How to Avoid Them
Using a track saw correctly requires proper setup, suitable equipment, and controlled cutting techniques. Avoiding common mistakes can improve safety, cutting accuracy, and the quality of the finished work.
1. Positioning the Guide Rail Incorrectly
A common mistake is placing the guide rail without checking the blade position. Even a small measurement error can result in an inaccurate cut.
How to avoid it: Measure the distance between the rail edge and blade, then check the position at both ends before cutting.
2. Failing to Secure the Material
An unstable workpiece can move while cutting, which can affect accuracy and create a safety hazard.
How to avoid it: Support the material properly and use suitable clamps or a stable work surface when necessary.
3. Using the Wrong Blade
A blade that is unsuitable for the material may produce rough edges, excessive splintering, or poor cutting performance.
How to avoid it: Select a sharp circular saw blade designed for the material and type of cut.
4. Setting the Blade Too Deep
Excessive blade depth increases unnecessary blade exposure and can make the cutting process less controlled.
How to avoid it: Adjust the depth so the blade extends only slightly below the workpiece.
5. Moving the Saw Too Quickly
Pushing the saw too fast can reduce control and place additional stress on the motor and blade.
How to avoid it: Maintain a steady feed rate and allow the blade to cut through the material naturally.
6. Ignoring the Splinter Guard
A worn or poorly positioned splinter guard can contribute to tear-out and reduce the quality of the finished edge.
How to avoid it: Check the guard regularly and replace it when it becomes worn or damaged.
7. Not Checking the Track for Debris
Dust, wood chips, and other debris can interfere with smooth saw movement along the rail.
How to avoid it: Clean the track before use and make sure the saw can move freely.
8. Cutting Without Proper Support
Large sheets can bend or sag when they are not supported correctly. This can affect the cutting path and place additional stress on the blade.
How to avoid it: Provide adequate support across the workpiece while keeping the cutting path clear.
9. Ignoring Safety Procedures
Skipping basic safety practices can increase the risk of injury during woodworking.
How to avoid it: Wear appropriate protective equipment, keep your hands away from the cutting path, and follow the manufacturer’s safety instructions.
10. Failing to Check Measurements
Relying on an estimate instead of accurate measurements can lead to incorrectly sized pieces.
How to avoid it: Measure twice, mark the cutting line clearly, and verify the rail position before starting the cut.
Track Saw Maintenance and Best Practices
Regular maintenance helps keep a track saw working smoothly and supports consistent cutting accuracy. Proper care also helps identify worn or damaged components before they affect performance.
1. Clean the Saw After Use
Remove sawdust and debris from the saw after each use. Pay particular attention to the base, blade area, and ventilation openings.
2. Clean the Guide Rail
Keep the guide rail free from dust, resin, and other debris. A clean rail allows the saw to move smoothly and helps maintain a consistent cutting path.
3. Inspect the Blade
Check the circular saw blade regularly for dull, damaged, or missing teeth. A worn blade can produce rough cuts and require more force during operation.
4. Replace a Dull Blade
Do not continue using a blade that has become excessively dull. Replacing it with a suitable sharp blade can improve cutting performance and reduce unnecessary strain on the saw.
5. Check the Splinter Guard
Inspect the splinter guard for wear or damage. Replace it when necessary to maintain proper support along the cutting edge.
6. Inspect the Power System
For corded models, check the power cord for cuts, cracks, or other damage. For cordless models, inspect the battery and connections according to the manufacturer’s instructions.
7. Check the Bevel and Depth Adjustments
Make sure the depth and bevel mechanisms move correctly and remain securely locked during use. Accurate adjustments are important for consistent results.
8. Maintain the Track Connection
If multiple guide rails are connected, inspect the joining points regularly. The rails should remain straight and secure so the saw can travel smoothly across the entire cutting path.
9. Store the Saw Properly
Store the saw and guide rail in a clean, dry location. Protect the rail from bending and avoid placing heavy objects on it.
10. Use the Saw According to Its Intended Purpose
Follow the manufacturer’s recommendations for materials, blade types, cutting depths, and operating conditions. Using the tool within its intended limits helps maintain performance and reliability.
11. Check the Saw Before Each Project
A quick inspection before use can identify loose components, damaged parts, or excessive wear. Address problems before beginning the cutting operation.
12. Keep Cutting Techniques Consistent
Good maintenance works best when combined with proper track saw cutting techniques. Use the correct blade, secure the material, position the rail accurately, and maintain a steady feed rate for reliable results.
| Importance | Why a Track Saw Is Necessary | Main Benefit |
|---|---|---|
| 1 | Makes long straight cuts easier | Better straight-cut accuracy |
| 2 | Uses a guide rail to control movement | Keeps the saw on the cutting line |
| 3 | Works well with large sheet goods | Easier plywood and panel cutting |
| 4 | Provides precise cutting | Consistent dimensions |
| 5 | Supports plunge cutting | Cuts can start away from an edge |
| 6 | Helps reduce splintering | Cleaner finished edges |
| 7 | Improves cutting control | More stable than freehand cutting |
| 8 | Handles bevel cuts | Useful for angled woodworking cuts |
| 9 | Saves setup time for repeated cuts | Faster and more consistent work |
| 10 | Suitable for different materials | Useful for plywood, MDF, boards, and other sheet materials |
Conclusion
A Track Saw guide provides a useful foundation for understanding this precision woodworking tool. From positioning the guide rail to selecting the right blade and setting the correct cutting depth, proper technique plays an important role in achieving clean and accurate results. A track saw is especially valuable for long straight cuts, plywood cutting, sheet goods, and controlled bevel cuts. With proper setup, safe operation, regular maintenance, and consistent cutting techniques, it can become a reliable part of a woodworking toolkit.
Frequently Asked Questions
Q1. What is a track saw used for?
A track saw is used to make straight, accurate, and clean cuts in plywood, sheet goods, boards, and other woodworking materials using a guide rail.
Q2. Can I turn my circular saw into a track saw?
Yes, some circular saws can be used with a compatible guide rail or track system, but they may not provide the same plunge-cutting control and precision as a dedicated track saw.
Q3. Do I really need a track saw?
You do not need one for every project, but a track saw is highly useful for long, straight, precise cuts, especially when working with large sheets of plywood or panels.
Q4. What are 5 uses of a saw?
Five common uses are crosscutting, ripping, bevel cutting, trimming, and cutting sheet materials such as plywood and MDF.
Q5. How deep can a track saw cut?
Cutting depth depends on the model and blade size. Many track saws can cut around 2 inches (50 mm) or more at 90°, while the depth is usually lower for bevel cuts.