
Introduction
scroll saw design allows woodworkers to turn ordinary pieces of wood into beautiful decorations, personalised gifts, and detailed craft projects. With the right patterns, suitable blades, and careful preparation, beginners can learn to create clean curves and intricate shapes. This guide explains popular woodworking patterns, essential cutting techniques, wood preparation, stack cutting, and safety tips to help you improve your skills and achieve better results.
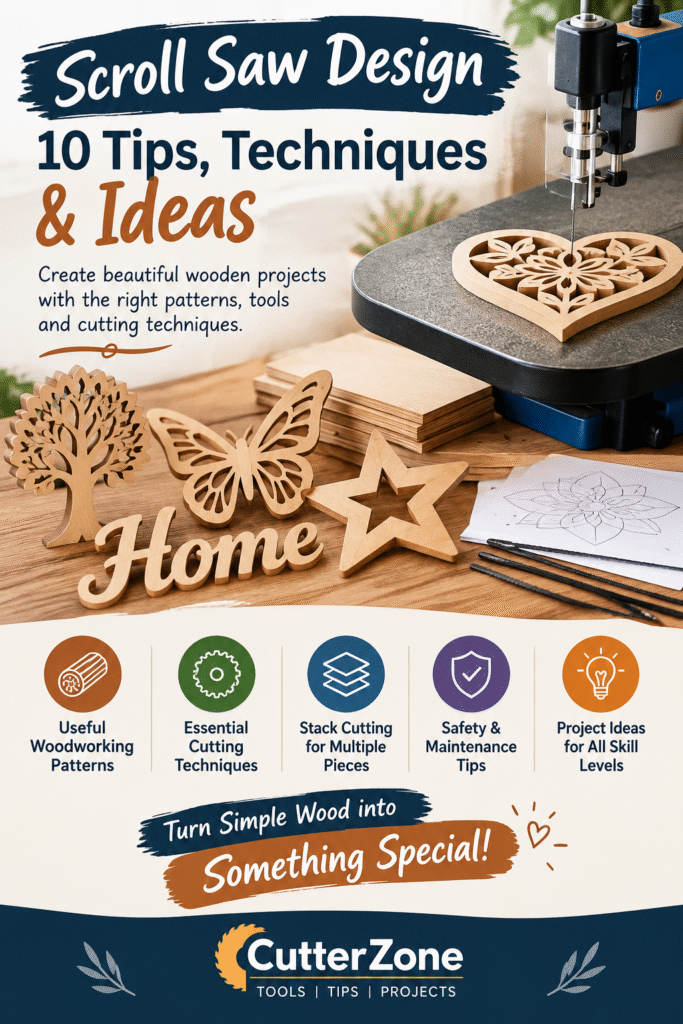
Table of Contents
What Is a Scroll Saw?
A scroll saw is a small woodworking machine designed to cut detailed shapes, curves, and patterns in wood and other suitable materials. It uses a thin, narrow blade that moves up and down rapidly, allowing users to make precise cuts that are difficult to achieve with many larger saws.
This tool is popular among beginners, DIY enthusiasts, and professional woodworkers. It is commonly used to create wooden letters, decorative ornaments, puzzles, silhouettes, and intricate fretwork.
Unlike a circular saw, which is mainly designed for straight cuts, this machine is suitable for curved lines and detailed shapes. Its narrow blade can also make internal cutouts when a starter hole is drilled in the material.
The cutting results depend on choosing the correct blade, securing the workpiece, and guiding the material slowly. With proper setup and safe working habits, users can produce clean and attractive wooden projects.
Scroll Saw Basics for Beginners
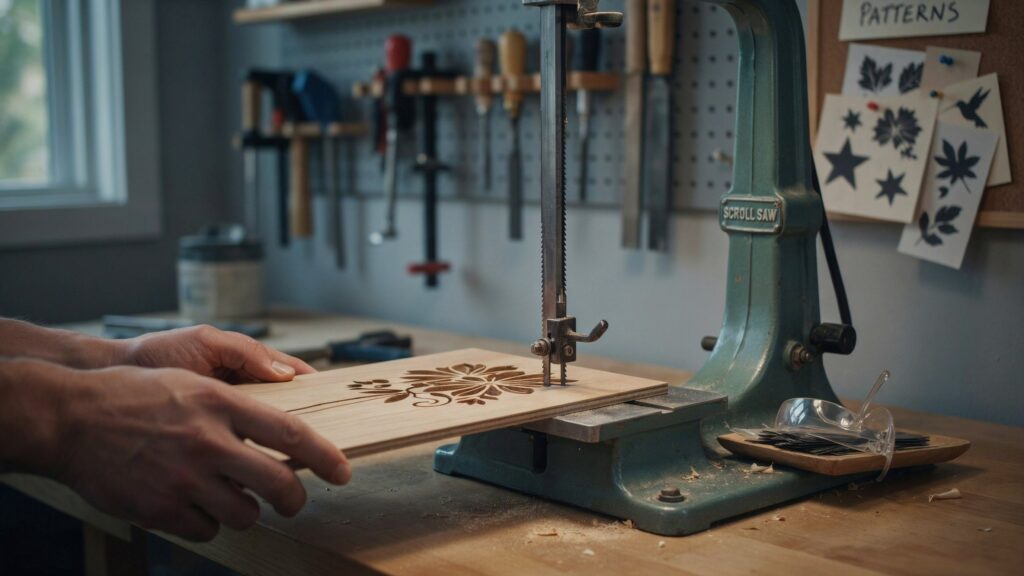
Beginners can achieve better results by becoming familiar with the machine before making their first cut. Learning how its components work and preparing the material properly can make woodworking easier, more precise, and safer.
Main Parts of a Scroll Saw
- Blade: Cuts curves, shapes, and detailed patterns in wood.
- Work Table: Supports the material while cutting.
- Blade Tension Knob: Helps keep the blade properly tensioned.
- Variable Speed Control: Adjusts cutting speed according to the material and task.
- Hold-Down Foot: Helps keep the workpiece stable during cutting.
Choosing the Right Blade
Blade selection depends on the wood thickness, material type, and complexity of the pattern. Fine blades are generally useful for intricate woodworking patterns, while suitable larger blades may work better for thicker pieces. Always follow the manufacturer’s recommendations.
Preparing the Wood
Choose flat, suitable wood such as plywood or thin hardwood. Mark the cutting lines clearly and check the material for cracks or defects. When Attaching Patterns, secure the printed template properly so it does not move during cutting.
Basic Cutting Techniques
Start with simple shapes and straight lines before attempting tight curves or detailed fretwork. Guide the material gently without forcing it against the blade. For accurate results, learn Squaring the Table by checking the table’s alignment with the blade according to the manufacturer’s instructions.
Always wear appropriate eye protection, keep your fingers away from the moving blade, and switch off the machine before changing blades or making adjustments. Practising these basics will help beginners develop better control and create cleaner woodworking projects.
Popular Types of Woodworking Patterns
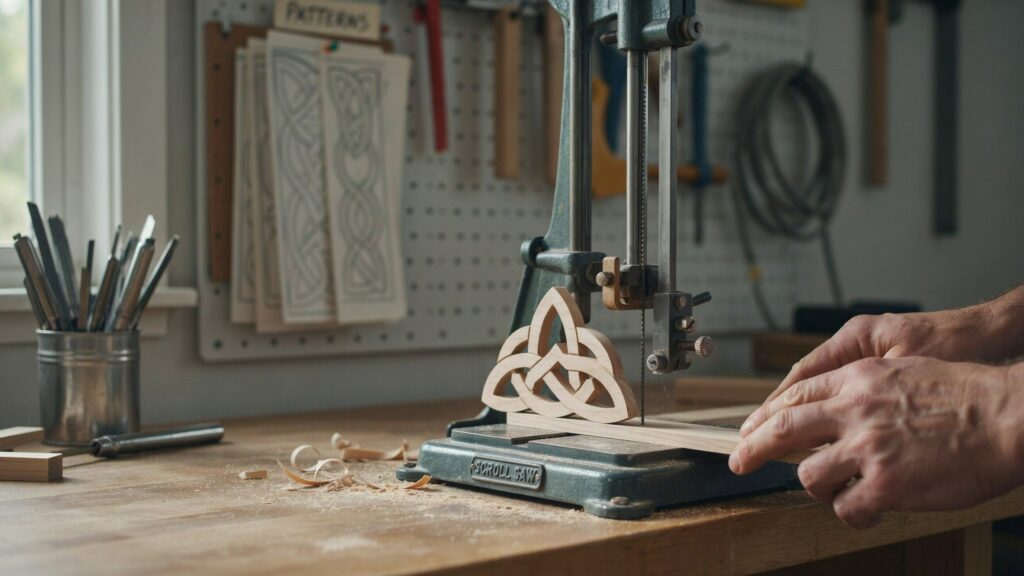
Woodworking patterns help turn ordinary pieces of wood into attractive decorations, useful objects, and creative gifts. The right template makes it easier to plan cutting lines and achieve a neat finish. Beginners should start with simple shapes before trying detailed designs.
1. Geometric Patterns
Geometric patterns use shapes such as circles, squares, triangles, and repeating lines. They are suitable for wall decorations, coasters, and simple wooden ornaments. Their clear lines make them a good choice for practising accurate cuts.
2. Floral and Nature-Inspired Patterns
Flower petals, leaves, trees, and animal shapes are popular choices for decorative wood cutting. These patterns often include curved lines that help woodworkers develop better blade control. Thin plywood can be suitable for many small projects.
3. Wooden Letters and Names
Letters, names, and initials can be cut to create personalised signs, gifts, and room decorations. Clear templates help maintain the correct letter shape and spacing. Beginners can start with large letters before attempting smaller details.
4. Fretwork Patterns
Fretwork creates decorative wooden pieces by removing selected areas from the material. The finished designs can feature flowing lines, linked forms, or ornamental edges. To achieve clean results, mark the layout carefully, drill entry holes where needed, and choose a suitable narrow blade for the wood being cut.
5. Silhouette Patterns
Silhouette projects focus on the outer shape of a subject, such as an animal, a human figure, a tree, or a natural scene. Woodworkers can turn these designs into decorative signs, holiday ornaments, or artwork for the home. New users can begin with basic outlines before moving on to more detailed shapes.
6. Patterns for Stack Cutting
Stack cutting allows several thin wood pieces to be cut together when they are securely fastened and the machine and blade are suitable for the combined thickness. It can help produce matching ornaments, letters, or decorative shapes. Check that the stack cannot shift and follow the saw manufacturer’s safety instructions.
How to Choose a Suitable Pattern
Consider your experience, wood thickness, blade type, and project purpose before selecting a template. Printable woodworking patterns with clear cutting lines are helpful for beginners. As your skills improve, you can try intricate wood designs and create your own templates for more personalised projects.
How to Choose the Right Pattern
Choosing the right woodworking pattern helps you achieve clean cuts and avoid unnecessary mistakes. The best choice depends on your skill level, wood type, project size, and the level of detail you want to create.
Consider Your Skill Level
Beginners should start with simple shapes, large curves, and easy wooden ornaments. These projects help develop cutting control without requiring complicated turns. As your skills improve, you can try detailed fretwork, floral shapes, and intricate wooden designs.
Check the Wood Type and Thickness
Choose a pattern that suits the material you plan to cut. Thin plywood is useful for many decorative projects, while thicker wood may require a suitable blade and a more powerful machine. Always check the saw manufacturer’s recommendations for material thickness.
Look at Pattern Complexity
When selecting a template, look closely at the size and spacing of its shapes. Designs with tiny gaps or tight turns can be difficult to cut cleanly without experience. Beginners should practice on patterns with simple outlines and clearly marked paths. Downloadable templates can also help them plan the layout before cutting begins.
Match the Pattern to Your Project
Think about what you want to make before selecting a template. Geometric designs work well for coasters and wall decorations, while wooden letters and nature-inspired shapes are suitable for personalised gifts. Fretwork patterns can create attractive panels and decorative ornaments.
Check the Size and Cutting Lines
Make sure the template fits your wood and work area. Print it at the correct scale, check the measurements, and mark any internal cutouts. When Attaching Patterns, secure the template properly so it does not shift during cutting.
Save Useful Templates for Future Projects
Keep your favourite designs in a well-organised patterns archive. Sort digital files and printed templates into folders based on project type or difficulty. This makes it easier to find suitable patterns and reuse them for future woodworking projects.
Tip: Test an unfamiliar pattern on scrap wood before using your final material. This simple step helps you check the cutting difficulty and improve accuracy while reducing waste.
How to Prepare Wood and Transfer a Pattern
Proper wood preparation helps you achieve accurate cuts and a smooth finish. Before starting a woodworking project, choose suitable material, prepare its surface, and transfer the template carefully.
1. Choose the Right Wood
Select flat, clean wood that suits your project. Thin plywood is often useful for decorative ornaments, wooden letters, and detailed fretwork. Softwood may be easier to cut for some beginners’ projects, while hardwood can require more effort and an appropriate blade.
Check the material for cracks, loose knots, and other defects before cutting.
2. Measure and Prepare the Surface
Measure the wood according to your template. Use a pencil and ruler to mark the cutting area, then smooth rough edges with sandpaper if necessary. Make sure the surface is clean and dry so the pattern can attach properly.
3. Transfer the Pattern to Wood
Print your selected template at the correct size. Place it on the workpiece and align it with the edges or centre marks. Attaching Patterns securely helps prevent movement and keeps the cutting lines in the correct position.
Common transfer methods include:
- Adhesive paper: Attach a printed pattern using a suitable repositionable adhesive.
- Carbon paper: Place carbon paper between the template and wood, then trace the lines.
- Direct marking: Draw simple shapes onto the wood using a pencil and ruler.
Choose a method that will not damage the wood or leave difficult marks to remove.
4. Mark Internal Cutouts
For designs with enclosed areas, clearly mark each opening that needs to be removed. Drill starter holes where necessary, using a drill bit large enough for the blade to pass through safely. Keep the holes inside the waste area so they do not damage the finished shape.
5. Check Before Cutting
Review the template and confirm that all lines are visible. Secure the wood on a stable work surface and check that the blade, table, and other machine settings are correct. Test the setup on scrap material if you are unsure.
Good preparation reduces mistakes, saves material, and helps produce clean, accurate woodworking patterns. Always follow the machine manufacturer’s safety instructions before operating the saw.
Squaring the Table for Accurate Cuts
A properly aligned table helps you make straight, clean cuts and maintain the correct angle when working on wooden patterns. If the table is tilted unintentionally, the edges of your finished piece may not be square. Checking the alignment before starting a project can improve cutting accuracy.
Why Table Alignment Matters
The table supports the wood while the blade moves up and down. Correct alignment helps you keep the material stable and achieve consistent results. It is especially useful when cutting wooden letters, decorative shapes, and detailed fretwork.
How to Check the Table Alignment
- Switch off the machine: Disconnect the power before making adjustments.
- Check the blade: Make sure it is installed correctly and properly tensioned according to the manufacturer’s instructions.
- Use a small square: Place a suitable engineer’s square or combination square on the table beside the blade to check whether the blade is perpendicular to the table.
- Adjust the table if needed: If the alignment is incorrect, use the machine’s adjustment mechanism and follow the manufacturer’s instructions.
- Tighten and recheck: Secure the table and check the alignment again before reconnecting the power.
Test the Setup Before Cutting
Try the settings on a spare piece of wood before working on your actual project. Make a short cut and inspect the result to see whether the cut is perpendicular to the surface. If the machine allows table tilting for angled cuts, return it to the required position before making straight cuts.
Common Mistakes to Avoid
- Adjusting the table while the machine is running.
- Assuming the table is square without checking it.
- Using a damaged or incorrectly installed blade.
- Forgetting to tighten the adjustment mechanism.
- Applying excessive pressure while guiding the wood.
Correct table alignment, suitable blade selection, and steady material control help improve the quality of detailed woodworking projects. Always consult your saw’s manual because adjustment methods can differ between models.
Techniques for Cutting Detailed Wood Patterns
Creating detailed wooden shapes takes practice, careful control, and a blade suited to the material. Good cutting habits help you achieve smoother edges, protect delicate sections, and improve the quality of your finished work.
1. Move Along the Pattern Carefully
Guide the wood steadily along the marked lines. Avoid rushing or pushing the material too hard, especially when working on small shapes and narrow sections. Slow, controlled movements help you maintain the intended shape.
2. Select a Suitable Blade
Choose a blade based on the wood’s thickness, hardness, and the level of detail required. Fine blades can help with tight curves and delicate patterns, while other blade sizes may be more appropriate for thicker pieces. Check your machine’s manual for suitable blade options.
3. Cut Curves with Control
Turn the wood gradually as you follow curved lines. Avoid forcing the blade to change direction suddenly, as this can damage the blade or spoil the cut. Practise different curves on spare wood before working on your main project.
4. Create Internal Openings
Some wooden patterns contain holes or enclosed shapes that require internal cuts. Drill a starter hole within the section you intend to remove. With the machine switched off and disconnected, release the blade as directed by the manufacturer, pass it through the hole, and reinstall it securely before cutting.
5. Achieve Smooth Edges
Use an appropriate, undamaged blade and maintain consistent control while cutting. Once the work is complete, gently sand rough edges with suitable sandpaper. Take extra care around thin details because excessive sanding can break or weaken them.
6. Keep the Wood Properly Supported
Keep the wood resting evenly on the table and guide it steadily through the blade without sudden movements. Use the hold-down foot according to the manufacturer’s instructions. Keep your fingers clear of the blade and never force the material through the machine.
7. Plan the Cutting Order
Review the template before switching on the saw. Identify tight turns, narrow connections, and internal sections that need extra attention. Cutting internal openings before the outside edge can help preserve support around the pattern until the final stage.
Practising these methods will help you develop better control and produce more accurate woodworking projects. Always wear suitable eye protection and follow the machine’s safety instructions.
Stack Cutting: Making Multiple Pieces
Stack cutting allows woodworkers to shape multiple wooden sheets in one operation instead of cutting each piece separately. This approach works well for producing identical letters, ornaments, and decorative items. With the layers aligned and secured properly, each piece can have a similar shape and size while reducing the time spent on repeated cuts.
How Does Stack Cutting Work?
First, select thin pieces of wood with similar sizes and thicknesses. Align the pieces carefully, place the chosen template on top, and secure the stack using suitable clamps or an appropriate fastening method. The materials must remain firmly together throughout the cutting process.
Steps for Stack Cutting
- Prepare the wood: Choose flat pieces without cracks or loose knots.
- Position all the wood layers evenly so their edges match and the surfaces sit flat against each other.
- Attach the pattern: Place the printed template on the top piece and secure it so it cannot move.
- Secure the stack: Use a suitable fastening method that keeps every layer stable without interfering with the blade.
- Check the setup: Confirm that the total thickness is within the saw and blade manufacturer’s limits.
- Cut carefully: Follow the marked lines slowly without forcing the wood into the blade.
- Separate and finish: Once the machine is switched off, separate the pieces and lightly sand rough edges.
Which Projects Are Suitable for Stack Cutting?
This technique works well for repeated wooden letters, matching ornaments, simple geometric shapes, and small decorative pieces. It can also help when creating several identical parts for a craft project.
Safety Tips to Remember
Do not stack more material than the machine can safely cut. Excessive thickness can increase blade strain, cause overheating, or produce uneven cuts. Keep hands away from the moving blade, use suitable eye protection, and follow the manufacturer’s instructions for blade selection and workpiece fastening.
Stack cutting is most effective when the materials are properly aligned and securely held. Beginners should practise with a small stack of thin wood before attempting more complicated patterns.
Common Mistakes to Avoid
Creating detailed woodworking patterns takes practice, patience, and proper preparation. Beginners often make a few common mistakes that can damage materials, reduce cutting accuracy, or create unnecessary safety risks. Preventing these common errors can improve the quality and precision of your finished work.
1. Choosing the Wrong Blade
Using an unsuitable blade can make curved cuts difficult and damage thin wood. Select a blade according to the material thickness and pattern details. Always follow the machine manufacturer’s recommendations.
2. Cutting Too Quickly
Moving the wood too fast can cause rough edges, broken sections, and inaccurate shapes. Guide the material slowly and allow the blade to cut without excessive pressure.
3. Skipping Pattern Preparation
Poorly transferred templates can lead to uneven shapes and incorrect measurements. Before cutting, make sure the printed pattern is correctly positioned and securely attached to the wood.
4. Ignoring Table Alignment
An incorrectly aligned table can affect cutting angles and the quality of the finished piece. Check the table and blade alignment before starting, especially when a project requires accurate edges.
5. Using Damaged or Unsuitable Wood
Cracked wood, loose knots, and uneven surfaces can cause problems during cutting. Inspect the material before use and select suitable wood for the complexity of your project.
6. Applying Too Much Pressure
Forcing the wood against the blade can cause it to bend or break. Use gentle, controlled movements and turn the workpiece gradually when cutting curves.
7. Forgetting Safety Precautions
Never adjust the machine or change the blade while it is running. Switch off and disconnect the power before making adjustments. Wear appropriate eye protection and keep your fingers away from the blade.
8. Attempting Difficult Patterns Too Early
Intricate fretwork and narrow internal shapes require good blade control. Beginners should start with simple geometric shapes and gradually progress to more detailed projects.
Practical tip: Test unfamiliar patterns on scrap wood before using your final material. Careful preparation, suitable blades, and regular practice can help reduce waste and improve the quality of your woodworking projects.
How to Store and Organize Patterns
Keeping woodworking patterns organized saves time and makes future projects easier to plan. A well-managed collection helps you find suitable templates without searching through piles of paper or folders.
Organize Printed Patterns
Store printed templates in labelled folders, envelopes, or binders. Group them by project type, such as floral shapes, wooden letters, geometric patterns, and decorative ornaments. You can also separate beginner, intermediate, and advanced designs.
Create a Digital Patterns Archive
A digital patterns archive makes it easy to save and reuse woodworking templates. Create folders on your computer and give each file a clear name. Include details such as the project type, dimensions, and difficulty level.
Keep a backup of important files on a separate storage device or trusted cloud service. Before printing a template, check its dimensions and print settings to ensure the pattern matches your intended project.
Protect Patterns from Damage
Keep paper templates in a dry place away from moisture, dust, and direct sunlight. If you reuse a pattern regularly, consider placing it in a protective sleeve. Label modified templates clearly so you can identify the correct version later.
Scroll Saw Project Ideas for Different Skill Levels
Choosing projects that match your experience helps you develop cutting skills gradually. Start with simple shapes and move towards detailed designs as your confidence improves.
Beginner Projects
- Wooden shapes: Practise cutting circles, squares, hearts, and stars.
- Basic ornaments: Make small decorative pieces with straightforward shapes and uncomplicated cuts.
- Wooden lettering: Make personalized initials or simple letters from wood using easy-to-follow outlines.
- Geometric designs: Make simple coasters and decorative pieces.
These projects help beginners learn blade control, follow cutting lines, and understand how different types of wood behave.
Intermediate Projects
- Decorative signs: Combine letters and simple shapes to create personalised signs.
- Floral patterns: Practise smooth curves and repeated shapes.
- Animal silhouettes: Cut recognizable outlines from suitable wood.
- Matching ornaments: Use stack cutting when the material thickness and machine capacity allow it.
Intermediate projects develop accuracy and help improve control around tighter curves.
Advanced Projects
- Detailed fretwork: Create decorative panels with many internal openings.
- Intricate wooden portraits: Work with complex outlines and fine details.
- Layered decorations: Combine separate cut pieces to produce depth.
- Custom woodcraft templates: Develop original patterns based on your own ideas.
Advanced projects require careful planning, suitable blades, and patience. Test difficult sections on scrap material before cutting the final piece.
Safety and Maintenance Tips
Safe working habits protect you from injury and help keep your equipment in good condition. Before every project, inspect the machine and prepare a clean, stable workspace.
Essential Safety Practices
- Wear appropriate eye protection while cutting wood.
- Keep your fingers away from the moving blade.
- Secure the workpiece and use the hold-down foot according to the manufacturer’s instructions.
- Never force wood through the blade.
- Switch off and disconnect the machine before changing blades or making adjustments.
- Keep loose clothing, jewellery, and long hair away from moving parts.
- Use suitable dust extraction or ventilation to control airborne wood dust.
Maintain the Machine Regularly
Check the blade for damage and replace it when necessary. Keep the table clean and inspect blade clamps, tension mechanisms, and other parts according to the manufacturer’s maintenance schedule.
Remove dust from the machine using the recommended cleaning method. Avoid applying lubricants or adjusting internal parts unless the manual permits it.
Improve Cutting Performance
Use a blade suited to the material and pattern complexity. Check blade tension and table alignment before starting, and test the setup on scrap wood when needed. If you notice unusual vibration, noise, or poor cutting performance, stop the machine and investigate the cause before continuing.
Regular maintenance, proper preparation, and careful operation help you complete woodworking projects more accurately and safely.
Top Five Frequently Asked Questions
Q1. What Is the Purpose of a Scroll Saw?
A scroll saw is used to cut detailed shapes, curves, and intricate patterns in wood. It is ideal for decorative ornaments, wooden letters, puzzles, and fretwork.
Q2. What Materials Can a Scroll Saw Cut?
A scroll saw can cut wood, plywood, plastic, and some other thin materials when the correct blade is used. Always check the machine manufacturer’s recommendations.
Q3. What Type of Wood Is Best for a Scroll Saw?
Thin plywood and softwoods such as basswood are popular choices. Basswood is easy to cut and works well for detailed projects, especially for beginners.
Q4. Can Beginners Use a Scroll Saw?
Yes, beginners can use a scroll saw to create simple wooden shapes and decorations. Start with easy patterns, choose a suitable blade, and follow safety instructions.
Q5. What Is Another Name for a Scroll Saw?
A scroll saw is sometimes called a fret saw machine. However, a handheld fret saw is a different tool that performs a similar type of detailed cutting.