
Introduction
Scroll saw projects are a creative way to turn ordinary wood into beautiful decorations, useful crafts, and personalized gifts. With the right tools, suitable wood, and simple patterns, beginners can learn to cut shapes while experienced woodworkers can explore detailed designs. From wooden ornaments and picture frames to puzzles and wall art, there are many ideas to try. This guide explains the tools and materials you need, how to choose patterns, and how to work safely while improving your woodworking skills.
Table of Contents
What Is a Scroll Saw?
A scroll saw is an electric woodworking tool used to cut detailed shapes, curves, and patterns in wood. It has a thin, short blade that moves up and down quickly, allowing users to make accurate cuts and small decorative designs.
This tool is useful for cutting plywood, thin boards, and other suitable materials. Unlike larger saws, it can create tight curves and intricate shapes when used with the correct blade and technique.
How Does a Scroll Saw Work?
The machine holds a narrow blade between two arms. When the motor starts, the blade moves up and down to cut the material. Users guide the wood slowly across the table to follow a pattern.
Common Uses
Woodworkers use this tool to make wooden ornaments, puzzles, lettering, picture frames, and decorative crafts. Beginners should start with simple designs and practise on scrap wood before attempting detailed cuts.
To work safely, use protective eyewear, keep your hands clear of the blade while it is moving, and follow the tool maker’s safety guidelines.
Scroll Saw Basics: Tools and Materials
Gather all the necessary tools and materials before beginning your work. A scroll saw, suitable blades, safety glasses, sandpaper, and a pencil are useful for most woodworking tasks. Choose softwood or thin plywood because these materials are easier to cut for beginners.
Use a printed pattern to guide your design. Transfer it onto the wood with a pencil, then select a blade suitable for the material and detail. Keep the work area clean and follow the machine manufacturer’s safety instructions.
Easy Scroll Saw Projects for Beginners
Beginners should start with simple designs that require fewer tight curves and inside cuts. These small crafts help build control and confidence before moving to detailed patterns.
- Wooden coasters: Cut basic circles, squares, or other simple shapes.
- Keychains: Make small wooden shapes and smooth their edges with sandpaper.
- Name plaques: Cut simple letters or use an easy outline for a personalized decoration.
- Wooden ornaments: Create stars, hearts, or seasonal decorations.
- Simple puzzles: Cut large, easy shapes from thin plywood to practise accurate cutting.
These beginner-friendly ideas are useful for learning how to follow lines, control the wood, and produce clean edges. Practise on scrap wood first, work slowly, and never force the material into the blade.
Creative Scroll Saw Project Ideas for Home Decor
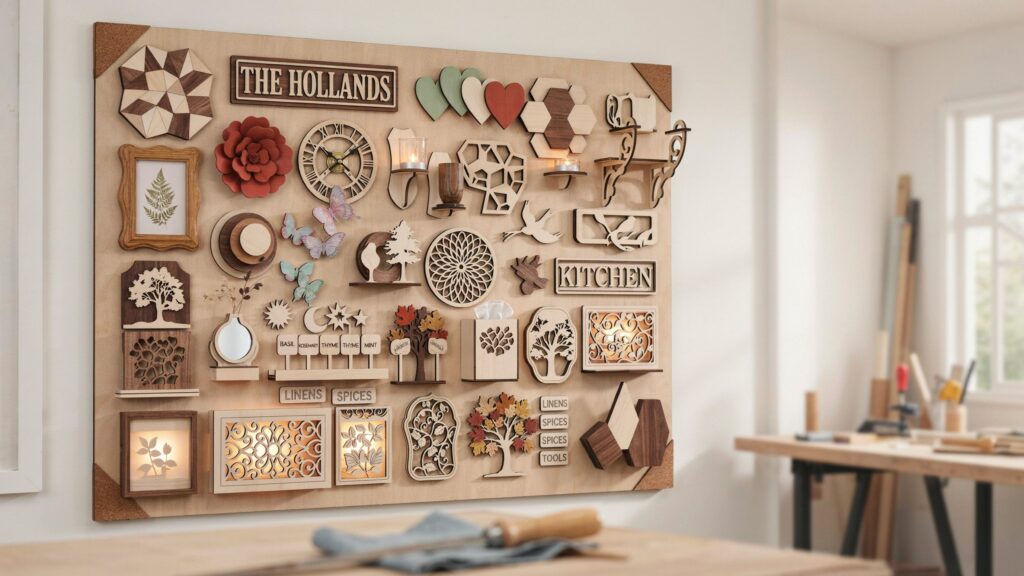
A scroll saw can help you create beautiful wooden decorations for different rooms. Choose suitable wood, simple patterns, and designs that match your home’s style. Here are 30 creative ideas with practical details.
1. Wooden Wall Art
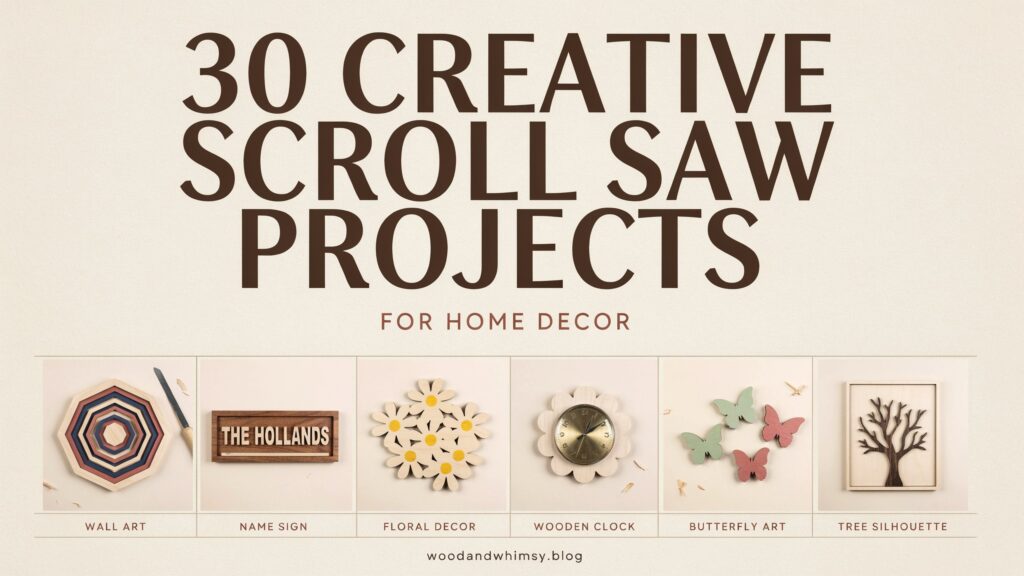
Cut geometric shapes, leaves, or abstract patterns from thin plywood. Sand the edges and paint the piece to match your room’s colors.
2. Decorative Name Signs
Create a personalized sign using family names or initials. Choose bold lettering for easier cutting and mount it on a wooden backing.
3. Wooden Picture Frames
Make a custom frame with curved edges or small decorative cutouts. Measure the photo first to ensure the frame fits properly.
4. Floral Wall Decorations
Cut flower shapes, petals, and leaf patterns from thin wood. Arrange several pieces together to create an attractive wall display.
5. Wooden Clocks
Create a round, square, or flower-shaped clock face. Leave space for the clock mechanism and follow its fitting instructions.
6. Heart-Shaped Wall Art
Cut heart outlines in different sizes for bedrooms or living rooms. Paint them in matching colors or keep the natural wood finish.
7. Geometric Wall Panels
Make triangles, hexagons, or other repeating shapes from thin plywood. Arrange the pieces in a balanced pattern for a modern appearance.
8. Wooden Candle Holders
Cut decorative outer shapes for a candle display, ensuring the design is suitable for its intended use. Keep combustible wood away from open flames and use battery-operated candles for safer decoration.
9. Decorative Shelf Brackets
Cut matching curved patterns from suitable wood to create decorative brackets. Ensure the finished brackets are properly designed and strong enough for their intended load.
10. Wooden Window Decorations
Make small decorative panels featuring stars, leaves, or simple geometric shapes. Hang them near a window where natural light can highlight their cutout patterns.
11. Butterfly Wall Art
Cut butterfly outlines with different wing patterns. Paint each butterfly separately and arrange them in a flying pattern on the wall.
12. Wooden Bird Silhouettes
Create bird shapes from thin plywood for a nature-inspired display. Use smooth curves and simple outlines to keep the cutting process manageable.
13. Decorative Door Signs
Make signs for bedrooms, kitchens, or home offices. Use clear lettering and a small border to create a neat appearance.
14. Wooden Mandala Art
Choose a mandala pattern with repeating shapes and balanced details. Start with a less complex design because very small sections can break during cutting.
15. Layered Wooden Wall Art
Cut several matching shapes and place them on top of one another. Different wood tones can add depth without requiring complicated painting.
16. Decorative Bookends
Cut matching animal, tree, or geometric shapes for bookend faces. Attach them to stable bases that can support the weight of the books.
17. Wooden Plant Markers
Make custom wooden markers for herb containers or plant displays. Shape each marker simply, then add the plant’s name with a durable, weather-resistant finish.
18. Tree Silhouette Decoration
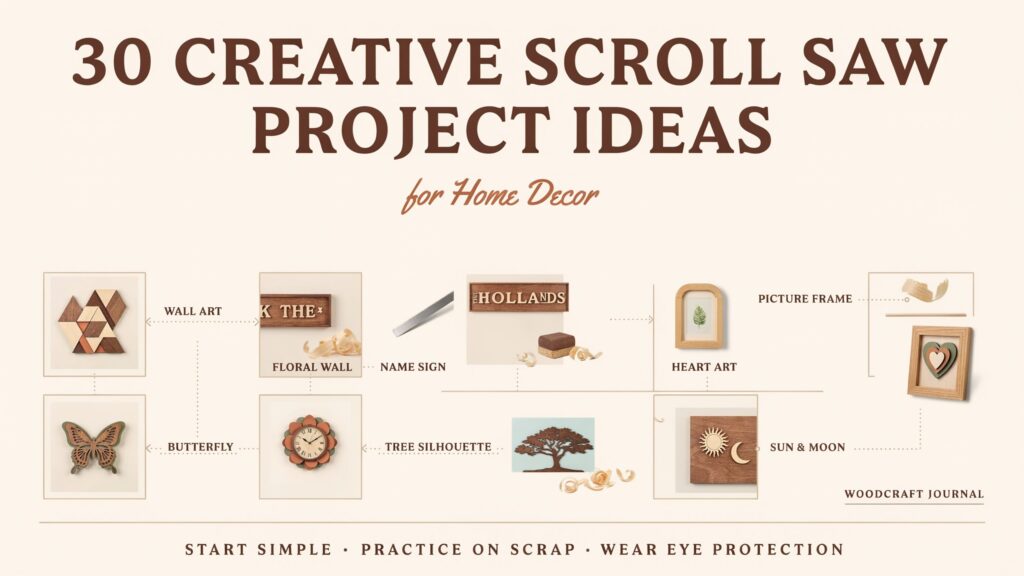
Cut the outline of a tree with branches and leaves. Display the finished piece on a shelf or mount it against a contrasting background.
19. Wooden Sun and Moon Art
Make sun, moon, and star shapes for a bedroom or study area. Smooth the edges and use a natural finish for a simple decorative look.
20. Decorative Room Dividers
Create small wooden panels with repeating cutout patterns for a decorative screen. Larger dividers need careful planning, suitable materials, and strong construction.
21. Wooden Tissue Box Cover
Cut decorative panels to fit a tissue box cover. Measure the box carefully and leave enough space for tissues to pass through the opening.
22. Decorative Lightbox Panels
Cut simple patterns into thin wooden panels for a lightbox. Use a suitable low-heat LED light source and keep electrical components properly enclosed.
23. Wooden Coaster Sets
Create matching coasters with leaf, flower, or geometric outlines. Sand them smoothly and apply a suitable protective finish after testing it on scrap wood.
24. Decorative Cabinet Inserts
Cut patterned inserts for cabinet doors or display units. Measure the opening accurately and make sure the insert fits without weakening the door.
25. Wooden Wall Vases
Create a decorative wooden backing for a lightweight wall-mounted vase. Use a separate, secure holder for the container and keep water away from untreated wood.
26. Seasonal Wall Decorations
Make leaves for autumn, snowflakes for winter, or flowers for spring. Store the pieces carefully so they can be reused each year.
27. Wooden Family Tree
Cut a tree outline with branches for displaying family names or photographs. Plan the layout before cutting so there is enough room for each detail.
28. Decorative Mirror Frames
Design a mirror frame with curved borders, floral patterns, or geometric shapes. Measure the mirror accurately and attach the frame securely with appropriate mounting fittings.
29. Wooden Storage Labels
Cut small labels for shelves, baskets, or storage boxes. Add clear lettering to help organize household items while keeping the design attractive.
30. Abstract Wooden Sculptures
Cut several simple shapes and join them into a small decorative arrangement. Test the fit of each piece before applying glue or a protective finish.
Helpful tip: Start with simple outlines, practise on scrap wood, and use detailed patterns only after you gain better blade control. Always wear eye protection and follow the tool manufacturer’s safety instructions.
Scroll Saw Patterns: How to Choose and Use Them
Scroll saw patterns help you cut accurate shapes, letters, and decorative designs from wood. Beginners should choose simple patterns with clear lines and fewer small details. As your skills improve, try more complex designs, such as flowers, animals, and geometric artwork.
How to Choose the Right Pattern
- Check your skill level: Start with basic shapes before trying detailed fretwork.
- Choose suitable wood: Make sure the pattern fits the size and thickness of your material.
- Check the cutting lines: Clear lines make it easier to follow the design accurately.
- Consider the blade: Select a blade that suits the wood thickness and the tightness of the curves.
How to Use a Pattern
First, print the design at the correct size. Transfer it onto the wood using a pencil or suitable adhesive pattern paper. Secure the workpiece on the saw table, then follow the lines slowly without forcing the wood.
For inside cuts, drill a small starter hole where needed, switch off the machine, and carefully thread the blade through the hole according to the saw’s instructions. After cutting, sand rough edges to improve the finish.
Where to Find Patterns
You can create your own designs or look for downloadable patterns from reputable woodworking websites. Review the design’s usage rights before using it, particularly if you intend to sell products made from it.
Tip: Practise on scrap wood first. Simple patterns help you develop better control and reduce material waste.
Advanced 10 Scroll Saw Projects
Experienced woodworkers can try detailed designs that require patience, steady blade control, and careful planning. These advanced woodworking ideas help develop precision and creativity.
1. Intricate Wooden Fretwork
Cut detailed patterns with small openings and narrow wooden sections. Use a fine blade and move the wood slowly to avoid breaking delicate parts.
2. Layered Wooden Art
Cut several pieces of wood with matching designs and stack them to create a three-dimensional effect. Different wood colors can add depth and contrast.
3. Interlocking Wooden Puzzles
Design individual puzzle parts that connect to create one complete picture. Plan the layout carefully and test the fit before sanding the edges.
4. Detailed Animal Silhouettes
Make realistic bird, deer, or wildlife shapes using complex outlines. Choose a clear pattern and practise tight curves on scrap wood first.
5. Wooden Portrait Art
Transform a suitable photograph into a high-contrast cutting pattern. This project requires careful preparation because thin sections can break easily.
6. Intricate Mandala Designs
Cut repeating circles, curves, and geometric details into a wooden panel. Keep the spacing balanced and use suitable wood to support the fine details.
7. Decorative Wooden Jewelry
Create lightweight pendants, earrings, or small ornaments with detailed cutouts. Sand every edge carefully and use appropriate findings to complete each piece.
8. Three-Dimensional Wooden Models
Cut multiple components that fit together to form a small structure or decorative model. Measure each part accurately before assembly.
9. Wooden Intarsia Pieces
Prepare shaped wooden pieces in different colors and arrange them into a larger picture. Accurate cutting and careful fitting are important for a neat result.
10. Complex Geometric Wall Panels
Combine repeating shapes, narrow openings, and symmetrical patterns. Plan the layout before cutting to maintain consistent spacing and avoid weak sections.
Helpful tip: Advanced designs require patience, sharp blades, and accurate pattern placement. Wear eye protection, keep your hands clear of the blade, and follow the manufacturer’s safety instructions.
Scroll Saw Projects for Kids: Safe and Simple Ideas
Woodworking can help children develop creativity, patience, and hand-eye coordination. However, a scroll saw is a power tool with a moving blade, so children must never operate it unsupervised. An adult should assess the child’s age and maturity, provide close supervision, and follow the manufacturer’s safety instructions.
1. Wooden Animal Shapes
Cut simple outlines of cats, birds, or fish from thin plywood. Children can help choose the design and decorate the finished shapes with paint under adult supervision.
2. Colorful Wooden Ornaments
Make basic stars, hearts, or circles for room decorations. Adults should handle the cutting while children help sand safe edges and apply suitable finishes.
3. Personalized Name Plaques
Prepare a simple name design with large letters. Children can help select colors and decorate the plaque after an adult completes the cutting.
4. Simple Wooden Puzzles
Create large, easy shapes that fit together. Adults should cut the pieces and check that they have smooth edges and are suitable for the child’s age.
5. Decorative Bookmarks
Cut thin wooden bookmarks with rounded corners and simple patterns. Children can decorate the finished pieces with non-toxic art supplies.
Essential Safety Tips
- An adult must supervise closely and control the cutting operation when appropriate.
- Wear suitable eye protection and secure loose clothing and long hair.
- Keep fingers away from the blade and never distract the person operating the saw.
- Switch off and unplug the machine before changing blades or making adjustments.
- Use non-toxic finishes and check every item for sharp edges or small parts.
Tip: Choose simple designs and let children participate in planning and decorating. This makes woodworking enjoyable while keeping safety the priority.
How to Make a Scroll Saw Project Step by Step
Making a wooden craft requires a suitable design, the right materials, and careful cutting. Follow these steps to create a neat and safe result.
Step 1: Choose a Design
Select a simple pattern that matches your skill level. Beginners should start with basic shapes before trying detailed curves or small cutouts.
Step 2: Prepare the Materials
Choose suitable wood or thin plywood. Check that the material is flat, clean, and free from cracks that could affect the cut.
Step 3: Transfer the Pattern
Print the design and attach it securely to the wood, or draw it with a pencil. Make sure the lines are clear and easy to follow.
Step 4: Select the Correct Blade
Choose a blade that suits the wood thickness and the design’s details. Follow the saw manufacturer’s instructions for fitting and tensioning it.
Step 5: Set Up the Work Area
Place the saw on a stable surface and keep the table clear. Wear eye protection and secure loose clothing and long hair.
Step 6: Cut the Design
Turn on the machine and guide the wood slowly along the marked lines. Avoid forcing the material or making sudden turns.
Step 7: Make Inside Cuts
For enclosed shapes, drill a starter hole where required. Switch off the machine before threading the blade through the hole, following the manufacturer’s instructions.
Step 8: Sand the Edges
After cutting, switch off the saw and remove the finished piece. Sand rough edges carefully to create a smooth surface.
Step 9: Apply a Finish
Remove dust and apply a suitable paint, stain, or protective finish according to its label. Allow it to dry fully before handling or displaying the item.
Tip: Practise on scrap wood first. Slow, controlled movements and careful preparation help produce cleaner cuts and reduce material waste
Common Scroll Saw Mistakes and How to Avoid Them
Beginners often make small mistakes that affect cutting accuracy and the final result. Understanding these problems can help you improve your woodworking skills.
- Using the wrong blade: Choose a blade that matches the wood thickness and design details.
- Pushing wood too quickly: Move the material slowly to maintain control and prevent blade breakage.
- Ignoring the pattern: Keep your eyes on the cutting line and make gentle turns.
- Skipping sanding: Smooth rough edges with suitable sandpaper for a cleaner finish.
- Using damaged wood: Check the material for cracks, knots, and other defects before cutting.
Scroll Saw Safety Tips for Better Results
Safe working habits protect you from injuries and help you achieve accurate cuts. Read the machine’s user manual carefully before operating the equipment.
- Wear suitable eye protection while cutting.
- Keep your hands clear of the blade while the saw is running.
- Secure loose clothing and tie back long hair.
- Maintain a tidy workspace with enough lighting to see your work clearly.
- Never force wood through the blade.
- Switch off and unplug the machine before changing blades or making adjustments.
- Use dust extraction where appropriate and avoid breathing fine wood dust.
- Never leave a running machine unattended.
Children should not operate the saw without appropriate adult supervision and safety precautions.
How to Improve Your Scroll Saw Skills
Improving your cutting skills takes regular practice and patience. Begin with basic designs, then slowly progress to patterns with finer details and greater complexity.
Practise basic cuts: Draw straight lines, circles, and gentle curves on scrap wood. Follow the lines slowly to develop better control.
Learn inside cuts: Practise drilling starter holes and threading the blade through them with the machine switched off.
Choose suitable materials: Thin plywood or other appropriate wood can be easier to handle when learning. Select blades according to the material and design.
Study your results: Check each finished piece for rough edges, uneven curves, and broken sections. Identify the cause and adjust your technique.
Maintain your equipment: Check blades regularly and replace damaged or dull ones according to the manufacturer’s instructions.
Regular practice, proper planning, and safe techniques can help you make smoother cuts and gradually work on more complex woodworking designs.
Conclusion
Creating wooden crafts is a rewarding way to develop patience, creativity, and practical woodworking skills. Begin with easy patterns, select the right wood, and practise accurate cuts before attempting more complex designs.. Always follow safety instructions, wear eye protection, and keep your workspace clean. With regular practice and proper preparation, you can create attractive decorations, personalized gifts, and useful items for your home. Choose a design that matches your skill level and enjoy learning one project at a time.
Frequently Asked Questions
Q1. What can I make with a scroll saw?
You can make wooden ornaments, picture frames, puzzles, wall art, name signs, coasters, and decorative shapes. Choose a design that matches your experience and the materials you have available.
Q2. What are some fun and easy scroll saw projects for kids?
Simple stars, hearts, animal shapes, and wooden ornaments are good options. An adult should supervise closely and handle cutting whenever appropriate for the child’s age and ability.
Q3. What are some free projects for beginners with a scroll saw?
Beginners can try simple coasters, keychains, bookmarks, stars, and basic wooden signs. You can begin with free, printable designs available on trusted woodworking websites.
Q4. What wood is best for scroll saw projects?
Thin plywood and softwood are common choices for beginners because they are generally easier to cut. Choose flat, defect-free wood that suits your design and blade.
Q5. How can I improve my scroll saw cutting skills?
Practise straight lines, curves, and simple shapes on scrap wood. Use the correct blade, guide the wood slowly, and sand the edges for a smooth finish.